github+hexo+butterfly 搭建个人博客_yjr-1100 的博客 - CSDN 博客
本文由 简悦 SimpRead 转码, 原文地址 blog.csdn.net
这里写目录标题
写在之前
在一开始我是在 CSDN 上写博客,记录一些学习过程,由于每次写完 markdown 再发布的过程比较麻烦,又不想花大价钱租服务器,所以暂时想到了是使用 github page 来做个人博客,进行学习过程的记录
开始折腾
有一个 github 账号
这方面的相关博客和教程比较多,这里就不再过多赘述了,其实一步一步来就可以
放一个官网链接 github 传送门
创建 github 仓库


上面两种方式都可以进入仓库创建界面,进入后显示如下

这里需要注意,仓库的名字必须是 XXX.github.io , 其中 XXX 要和你前面的用户名相同,仓库的 discription 自己想写什么就写什么,就的对仓库的一个描述,最后点击 Create repository 就可以了
安装相关软件
安装 git 工具

点击上方 logol 传送去 git 官网,选择和系统相符的 git 版本进行下载安装,安装过程中想改安装位置的可以改一下,其他的一直下一步就好了
如果
安装好后,我们右键可以看到 git bash 和 git gui 就已经安装好了

对于 git 的使用和安装可以看 廖雪峰老师的官网
安装 Node.js
这里我推进使用 nvm 来管理 node 的版本, 因为在我做项目过程中,可能需要维护别人的老项目,所以 node 版本经常不匹配,使用 nvm 进行 node 版本的管理,可用方便的切换不同版本的 node 。
windows 的话,可以在 github 上下载 nvm 打开我们可以看到两个版本
nvm-noinstall.zip:绿色免安装版,但使用时需进行配置
nvm-setup.zip:安装版,推荐使用

nvm 的具体安装和使用简书 Do_Du 有详细的步骤,可以进行参考
安装 Hexo
![]()
点击上方 logo 可以去官网了解更多 Hexo 的内容
1 | npm install hexo-cli -g |
复制上面这句代码,在一个没有中文的路径下新建一个文件夹做为博客的目录
进入文件夹中,右键 git bash here, 并粘贴代码回车运行

看到 updated 1 package 就安装好了
初始化和本地博客的搭建
初始化本地博客
1 | cd ../ |
在刚才初始化的窗口分别键入上面两句代码,对本地博客进行初始化

当看到图中的信息后,你的本地博客就初始化完成了,可以进入刚才博客的文件夹(这里我的文件夹名字是 blog),发现多了很多文件
1 | cd blog/ |
使用上面第一条命令进入文件夹内,blog需要替换为自己的文件夹名称
进入后使用第二条命令进行依赖的安装

看到如上图信息就安装成功了
1 | hexo s |
在博客的根目录下(即刚才博客的文件夹下)输入上面的命令,启动博客

可以看到如图的输出信息,我们可以在 localhost:4000 去看一下我们博客现在的样子, 大概就是下面这样

停止运行我们只需要输入 Ctrl+C 就可以了
配置 git
如果不是第一次使用 git 可以跳过这一步
在刚才的 git bash 中输入
1 | cd ~/.ssh |
如果提示 No such file or directory 说明你是第一次使用 git
先配置使用 git 人的身份,在 git bash 中分别输入下面两个命令,用户名 用 github 的用户名就好 邮箱 也使用注册 github 的邮箱
1 | git config --global user.name "这里换上你的用户名" |
再进行 git 的 ssh 配置, 同样 邮箱 使用注册 github 的邮箱
1 | ssh-keygen -t rsa -C "这里换上你的邮箱" |
命令执行后需要进行三次确认,按回车就完了
命令执行完成后,在用户目录 (就的 c 盘下 User 里你用户名的目录) 的 .ssh目录 下会生成 2 个名为 id_rsa 和 id_rsa.pub 的文件

打开 github 点击右上角你的头像,进入 settings

选择 SSH and GPG keys

点击New SSH key,并把之前生成的id_rsa.pub文件,用记事本打开,将内容复制到key下的文本框, title 的话自己随便写一个自己明白的就好,最后点击 Add SSH key

回到 git bash 输入下面的命令
1 | $ ssh -T [email protected] |

看到 access 就成功了,如果是第一次,可能需要确认一下,输入 yes 后回车,就会提示成功
安装 deployer 插件
1 | npm install hexo-deployer-git --save |
在博客文件夹目录下,的 git bash 中输入上面的命令进行安装
发布博客到 github.io
想要发布博客到 XXX.github.io 首先要让 hexo 知道你的 github 位置,进入本地博客根目录修改一些配置,在博客的文件夹下打开_config.yml 开始编辑
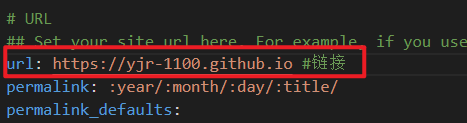
修改 url:
修改 deploy, 注意红标的地方写自己的 github 名称,branch 默认的话现在是
main,之前好多博客中写的是master这是之前的分支名称,如果没有改过,那么就是main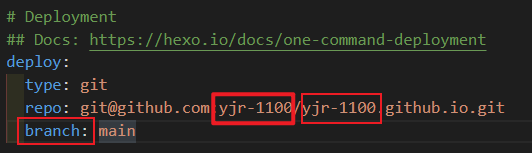
修改配置后,在 git bash 中分别输入
1 | hexo clean |
等待命令执行完成,就发布成功了,可以打开你的地址进行查看https://XXX.github.io 这里 XXX 就是你的用户名,比如我的 https://yjr-1100.github.io
配置好看的主题,并写博客
又到了最麻烦和最开心的时刻,配置好看的主题让你的博客变的独一无二吧
安装 butterfly 主题
你可以在 hexo 的主题库 中找到自己喜欢的主题,这里我用的是 butterfly 主题
打开主题的主页,里面其实有很多详细的教程
1 | git clone -b master https://github.com/jerryc127/hexo-theme-butterfly.git themes/butterfly |
在你的博客根目录下执行上面的代码,下载主题
为了使这个主题可用,我们还需要安装几个插件,再博客的根目录下运行下面的命令
1 | npm install hexo-renderer-pug hexo-renderer-stylus --save |
配置 butterfly 主题
注意在进行下面配置过程中随时执行 hexo clean hexo g hexo s 来确保没有出错,并且注意: 后面都会有空格,如果报错即时检查
应用主题
我们需要继续配置 _config.yml 文件来应用我们的主题,在_config.yml 文件中找到 theme 填写我们主题的名字

并且在博客文件夹根目录下新建一个_config.butterfly.yml 的文件,将主题的配置文件复制进去,目前这个版本的主题配置文件在 /themes/butterfly/_config.yml

创建几个页面
这里我只创建了几个目前我需要的,可以根据主题官方的说明进行其他的配置
标签页
1
hexo new page tags
执行上面代码并在 source/tags/index.md 的头部添加
type: "tags"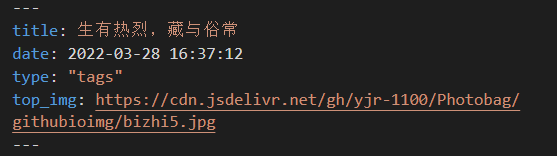
title就是页面中间显示的内容,自己根据喜好写就好top_img就是页面顶部的背景图片分类页
1
hexo new page categories
执行上面代码并在 source/categories/index.md 的头部添加
type: "categories"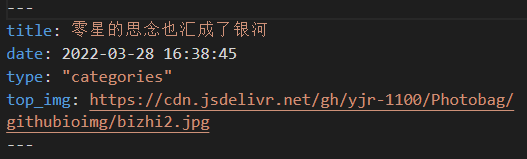
titletop_img和上面一样友情链接页
1
hexo new page link
执行上面代码并在 source/link/index.md 的头部添加
type: "link"
titletop_img和上面一样对于友情链接的设置我们需要在
source目录下新建一个_data文件夹,并创建一个link.yml,按照下面的内容进行修改1
2
3
4
5
6
7
8
9
10
11
12
13
14
15
16
17
18
19
20
21
22
23- class_name: 友情链接
class_desc: 那些人,那些事
link_list:
- name: Hexo
link: https://hexo.io/zh-tw/
avatar: https://d33wubrfki0l68.cloudfront.net/6657ba50e702d84afb32fe846bed54fba1a77add/827ae/logo.svg
descr: 快速、简单且强大的网誌框架
- class_name: 网站
class_desc: 没问题,就是学习
link_list:
- name: jquery之家
link: http://www.htmleaf.com/
avatar: https://cdn.jsdelivr.net/gh/yjr-1100/Photobag/githubioimg/jqueryhome.jpg
descr: 自由分享jQuery、html5和css3的插件库
- name: jquery插件库
link: https://www.jq22.com/
avatar: https://www.jq22.com/img/logo.png
descr: jquery插件库
- name: AcWing
link: https://www.acwing.com/
avatar: https://cdn.acwing.com/media/activity/surface/logo100x100.png
descr: 算法刷题关于我页面
1
hexo new page about
执行上面代码并在 source/about/index.md 的头部添加
type: "about"
titletop_img和上面一样404 页面
主题内部内置了一个 404,我们只需要打开就好,进入
_config.butterfly.yml找到下面的设置,把enable改为true
修改浏览器标签栏 Icon
在 themes/butterfly/source/img/ 文件夹下,放一个自己的 icon ,在 _config.butterfly.yml 文件中,找到 favicon 进行编辑,改为自己图片的路径
1 | # Favicon(網站圖標) |
设置导航栏
在 _config.butterfly.yml 文件中,找到 menu 进行编辑
1 | menu: |
设置主页的头部图片和背景图片
在 _config.butterfly.yml 文件中,找到 index_img 和 archive_img ,在后面写上图片的 url, 其他的有兴趣也可以设置, 找到background 在后面写上背景图片的 url

1 | # Website Background (設置網站背景) |
设置页脚开启页脚背景
在 _config.butterfly.yml 文件中,找到 footer 修改 enable 为 true,找到 footer_bg 修改为 true
1 | footer: |
开启页面美化
在 _config.butterfly.yml 文件中,找到 beautify 修改 enable 为 true
1 | beautify: |
设置首页动态打字效果
在 _config.butterfly.yml 文件中,找到 subtitle 修改 enable 为 true , 并在 sub 下写自己的想打的句子
1 | # the subtitle on homepage (主頁subtitle) |
修改侧边栏
在 _config.butterfly.yml 文件中,找到 aside 修改 enable 为 true , 并在 card_announcement 下修改公告内容,在 card_author 下修改自己的 Github 链接,找到 busuanzi 打开访问人数 ,找到 runtimeshow 打开网页运行时间
1 | aside: |
设置社交账号
在 _config.butterfly.yml 文件中,找到 social 修改, 冒号前面的是图标,使用的图标库是 font-awesome v6, 冒号后边是网址和名称
1 | social: |
开启繁简体切换和阅读模式
在 _config.butterfly.yml 文件中,找到 translate 修改 enable 为 true ,找到 readmode 修改为 true
1 | # Conversion between Traditional and Simplified Chinese (簡繁轉換) |
写文章和发布博客
配置好后,再运行下面三个命令,打开本地博客看一下
1 | hexo clean |
当我们需要写博客的时候,我们可以使用命令
1 | hexo new post 文章名 |
来创建一个文件,改文件的位置就在 /source/_posts 下,我们可以打开新建好的 .md 文件进行编辑。
hexo new post 命令使用的就是 post 模板,可以在/scaffolds 文件夹下找到改模板,我们可以编辑模板的头部,方便以后生成。
1 | --- |
其中:
tags用来写新增文章的标签
categories指明文章的分类,这个指明后会自动在分类页面被归类
description描述本篇文章,类似摘要
top_img指定文章头部的图片
cover指定文章在首页展示时的缩略图
keywords就是页面关键字
我们写好后,就可以在本地博客看到新写的博客了,再次执行下面的命令,就可以发布到 github.io 中了
1 | hexo clean |
一些其他的设置
绑定自己的域名
购买一个域名 可以去阿里云 进行域名注册
为域名设置解析 拿阿里云为例,进入控制台,选择域名解析

添加 CNMA 解析,我这里添加的是二级域名,

在 xxx.github.io 的仓库中新建文件名为
CNAME,写入你刚才解析的域名
在仓库的
settings里找到pages进行设置,下面的那个对勾需要等一会才能勾选
等一会就可以使用这个域名进行访问了,比如我可以通过
https://yjr1100blog.jerryfirst.top/进行博客的访问使用
hexo d的时候一般会把这个 CNAME 文件覆盖掉,所以我们可以在本地的source文件夹下创建一个CNAME文件把刚才的内容写进去,这样在进行hexo d的时候,就也会同时进行上传
进行文件更替
我们 xxxx.github.io 仓库里的文件只有 hexo g hexo d后的内容,没有源文件,加入我们电脑坏了,数据丢了,我们的博客就没了,所以我们建一个私有仓库进行我们原文件的更替
在 github 中建立一个私有仓库

在博客文件夹下创建
.gitignore文件,内容入下1
2
3
4
5
6
7
8
9
10
11
12.DS_Store
Thumbs.db
db.json
*.log
node_modules/
public/
.deploy*/
.vscode/
/.idea/
.deploy_git*/
.idea
themes/butterfly/.git在博客的文件夹下 执行
1
2
3git init
git add .如果执行
git add .提示1
2
3
4
5
6
7
8
9
10
11
12
13hint: You've added another git repository inside your current repository.
hint: Clones of the outer repository will not contain the contents of
hint: the embedded repository and will not know how to obtain it.
hint: If you meant to add a submodule, use:
hint:
hint: git submodule add <url> themes/butterfly
hint:
hint: If you added this path by mistake, you can remove it from the
hint: index with:
hint:
hint: git rm --cached themes/butterfly
hint:
hint: See "git help submodule" for more information.这个意思因为
themes/butterfly/下也有一个.git文件夹 ,git 认为themes/butterfly是子仓库,但是对于子仓库还需要配置其他东西才可以进行 add 所以有了这个提示如果想要提交
themes/butterfly中的内容,那我们可以选择删了themes/butterfly下的.git文件,并执行git rm -f --cached themes/butterfly先删了 add 里的这个文件,再添加一次添加好后,依次执行下面的命令,完成源文件上传, 其中
[email protected]:yjr-1100/blogdata.git要改成自己仓库的信息1
2
3
4git commit -m "first commit"
git branch -M main
git remote add origin [email protected]:yjr-1100/blogdata.git
git push -u origin main以后我们改完文件执行进行提交就好了
其它一些注意事项
github.io 没有更新的问题
如果git bash 中执行 hexo d 没有报错,仓库里的东西也更新了,但是你的 xxx.github.io 却没有立刻得到更新,请耐心等一等,也可能 github pages 还在 deploy